Traverse Global v11.2
Projects
Use the Projects function to determine how the project uses phases and tasks, measures income, and allows billings. Before entering project information, take some time to plan the project's income measurement environment, its project type, and, if available, its billing format.
Use the command buttons to:
| Click | To |
|---|---|
| New Project | Open a new project record. |
| New Task | Open a new task record if you select an active project. |
| Estimates | Open the Estimates function for the selected project. |
| Project Status View | Launch the Project Status Interactive View. |
| Dashboard | Load the Project Dashboard window to show cost, history, and profit information for the selected project, phase, or task. |
| Site Info |
Add site information to the project. Select a site ID from the customer's ship-to locations, then change site information as required. To add a new site, you must first add the site ID to the customer's ship-to locations before you can add the site to the project.
|
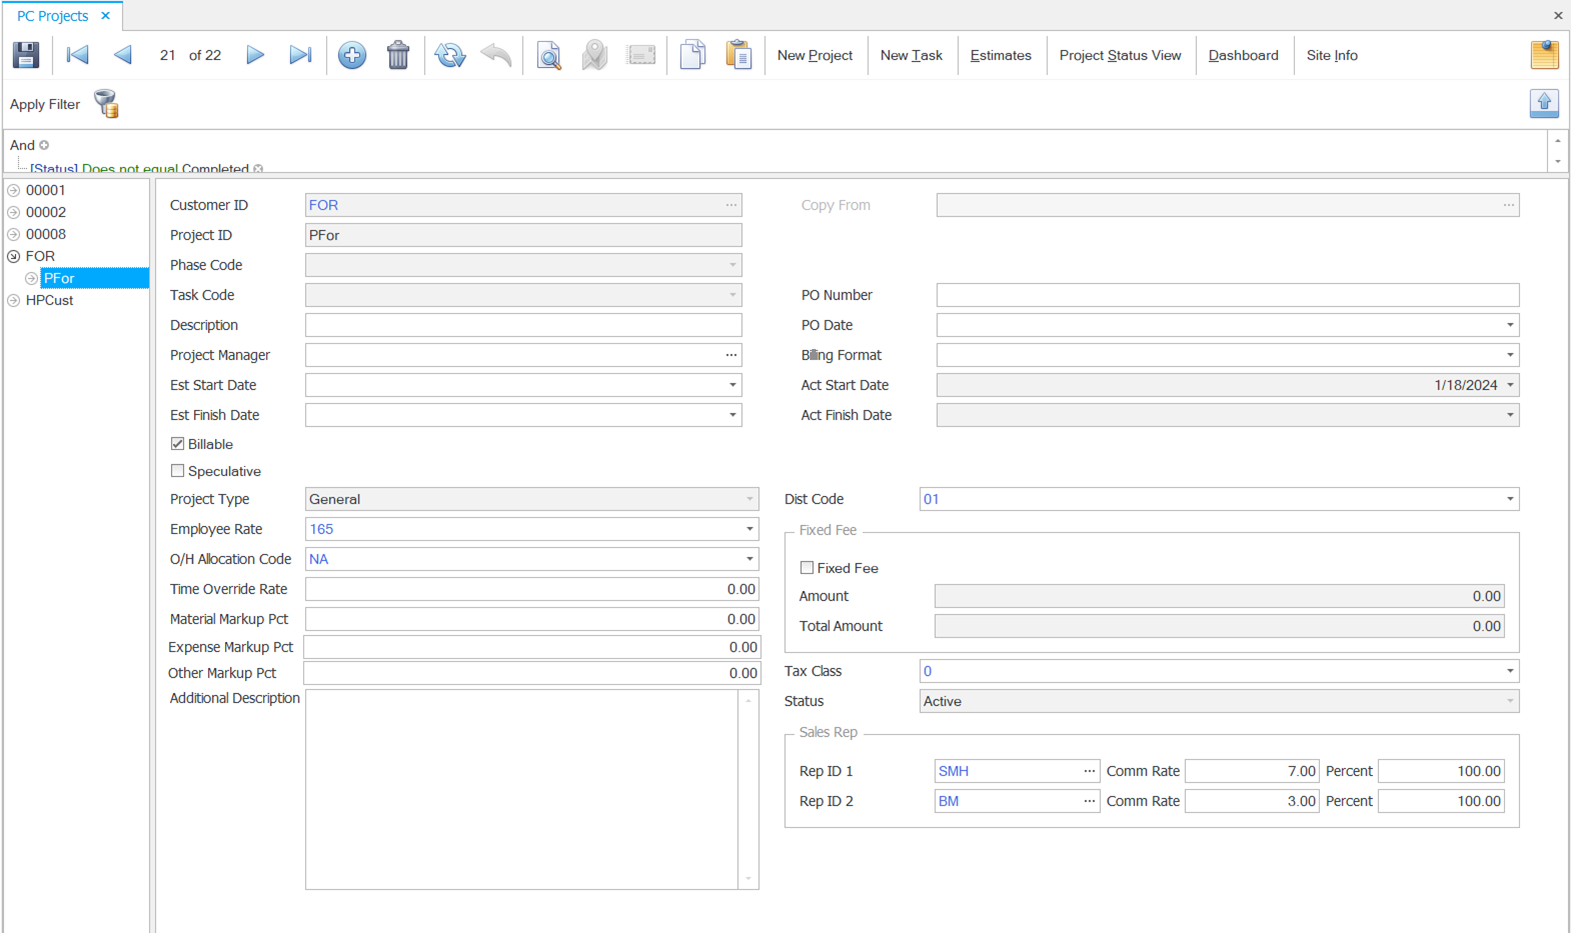
To work with an existing project, click the Apply Filter button to apply the criteria and retrieve the existing projects that meet the criteria. The existing projects will display in the left panel in a tree format. Expand the branches of the tree by clicking on the plus sign for each entry.
- To create a brand-new project, use the New Project button on the toolbar.
- To copy project information from an existing project, select the existing project in the Copy From drop-down list.
- Select a Customer ID from the drop-down list. You do not need to assign a project to a customer. If you do not select a customer, the project will be assigned to a record named "Unassigned". If you are entering a project to track internal costs, leave the customer ID blank and only costs will be tracked. If you want to assign a customer to an unassigned project, you may select a customer ID any time after the project has been set up.
- Enter a Project ID.
- Select a Phase Code. This will only be available when the New Task button is selected and a task is assigned to the project.
- Select a Task Code, as needed. A task code can be assigned to a project without assigning a phase code. If you have a task code selected with no phase code, the phase level in the tree will display as "Unassigned".
- Enter a Description for the project.
- Enter a PO Number and PO Date, as applicable.
- Select a Billing Format from the drop-down list, as applicable. This allows you to select a Design Studio form you have designed or modified and saved. NOTE: To change the billing format from the default invoice format you must use the Design Studio to modify the existing Project Costing Invoice form and save the corresponding form to the database or to a shared folder that all workstations using Project Costing can access.
- Select a Project Manager from the drop-down list.
- Enter an Estimated Start Date and Estimated Finish Date.
- This view-only Act Start and Act Finish fields display the actual start and finish dates. The system updates this field automatically when you post the first charge to the project.
- Mark the Billable check box to select whether the project is billable. A Billable project type tracks costs, accrued income, and billings using phases and tasks. You can bill Billable projects either at fixed fees or at non-fixed fees based on costs you incur.
- Mark the Speculative check box to select whether the project is speculative. A Speculative project is simply a vehicle for assigning resources to prospective projects. It allows the use of phases and tasks and accrues income, but does not allow billing. To bill for a Speculative project, you must first change the project type to either Billable or Job Costing.
- Select a Project Type from the drop-down list.
- Select a Distribution Code from the drop-down list.
- Select an Employee Rate for the project. Each Employee can have unlimited combinations of cost and billing rate. The rate level entered here is used as the default but can be overwritten during time ticket entry.
- Select an overhead allocation code from the O/H Allocation Code drop-down list.
- Enter the Time Override Rate for the project. This value will override employee billing rates for this particular project/phase/task if so desired. If the rate is set to zero, the rate from the employee rates setup is used.
- Enter the Material Markup Percentage, Expense Markup Percentage, and Other Markup Percentage for the project, as applicable.
- Enter an Additional Description for the project.
- Mark the Fixed Fee check box to select whether you want to bill a Billable project or phase at a fixed fee. Note: Job Costing projects automatically select this check box by default.
- The view-only fixed fee Amount and Total Amount fields display the fixed fee amounts you enter for the project or phase using the Prepare Billings function.
- Select a Tax Class to use for the project or phase.
- The Status field to indicates the status of the project.
- Select the Sales Rep ID(s) to associate with the project, along with Comm Rate(s) and commission Percentage(s)
Save your changes.